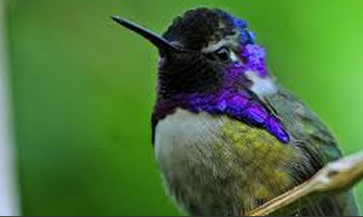
Summer is here, flowers are in bloom, and the birds are chirping. Hummingbirds have been flying about and looking for food. Check out this super simple, DIY homemade hummingbird feeder so you can enjoy those little, fast-winged beauties as they fly around collecting all the nectar.
Materials Needed:
- Shallow Jar (Baby Food Jar works great)
- Red Polymer Clay
- Flower shaped cookie cutter
- 16-gauge galvanized wire
- Drill
- Needle nosed pliers
- Rolling Pin
- Glass Beads
Directions
1. Clean out your jar thoroughly. The more shallow the jar the easier it is to keep clean and be refilled.
2. Flatten the clay using a rolling pin. This is a fun part for the kids to do with you. Get creative and use different colors. Pick one color to be the base of your flower and using the top of the jar lid press it down to remove any pockets of air there might be. Trim away any excess clay and smooth the clay down the sides of the lid so it is completely covered.
3. With the other colors of clay, make the design of your flower to go on top of the base that you just made. Have fun with it. Use different shapes and designs. Using cookie cutters or be brave and freehand it. The brighter the colors the better. Hummingbirds are typically attracted to red, so make sure that’s part of your creation.
4. After you have finished your clay flower, cut out the clay. Try layering it to enhance it. This helps to give the illusion that it is a real flower, which will attract more hummingbirds.
5. Being very careful, press the layers of clay into the lid base. Be sure you do not press too hard because it might ruin your design. However, you do want the layers to fuse together when you bake them.
6. Read the directions on your clay and bake accordingly. Typically most clays will bake at 275 degrees for 15 minutes.
7. After you have allowed the clay to cool completely, using the drill, make a small hole through the top of the clay flower. This allows for the hummingbirds to access the nectar.
8. Cut about 32in of wire, fold it in half and leave a loop at the top. At the end of the wire make a larger loop, then bring them together and twist 12 times. Bend the wire and get creative with the shape of the loops until you get the design you are going for. Wrap each end of wire around the jar, bring them together and twist three times. This will make a tight loop to hold the feeder.
9. Trim the excess wire, leave 1/4 in for a loop to add the beads you have selected for more color and design.
10. Fill with nectar and place in a location for you to enjoy the fruits of your labor. Watch the amazing hummingbirds be attracted to your artwork.
By Michelle B. Today’s Free Stuff Contributor
Leave a comment