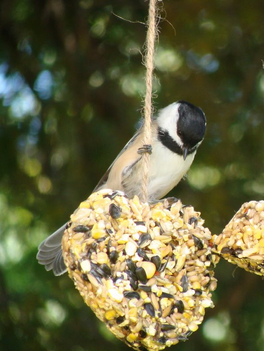
As a former preschool teacher, I loved making simple bird feeders with my students, to take home and enjoy with their families. I now look forward to re-creating those moments with my girls in the upcoming weeks.
While this is a craft that seems to take place primarily in the spring, these handmade bird feeders can remain up year round, attracting a variety of breeds to admire in your own backyard. Just change out the seed as needed and replace when necessary. Remember, buying an elaborate bird feeder may look nice, but all feathered friends will eat from anything, if hungry enough!
I remember as a kid myself, those tricky pine cone bird feeders. Not only were they a tad prickly for little hands, but they also aren’t as easy to find as other similar materials. At least not around my neighborhood. I’ve opted to share simple instructions on how to make apple or bread feeders with your kids.
Apple Feeders
Ingredients
- Apples
- Knife (Adults Only)
- Plastic Knife (For Kids)
- Peanut Butter
- Birdseed
- Gallon Milk Jug
- Yarn or String
- Optional: Paper Plate/Small Bowl, Wooden Dowels, Acrylic Paint/Brushes)
Here is how to build your project:
- Cut into an apple to make wide indentations and grooves all around.
- Have your child coat the apple with peanut butter or honey, using a plastic knife or small spreader. (Please note that honey is fatal to hummingbirds, so if you aren’t sure whether or not your yard attracts them, “stick” with the peanut butter.)
- Next, help roll the coated apple into the birdseed mixture. Store bought is fine or opt for millet, corn, or the preferred food source for birds- black sunflower seeds (this according to the Audubon Society). Using a paper plate for this step is advisable, or perhaps a small bowl.
- Use an old milk jug (gallon size) and cut in half. Poke 2 holes across on each side and form a loop with yarn or string. Your child can loop and tie the string if age-appropriate.
- Drop the apples inside the jug and hang from a tree limb.
- To extend the project, you can add additional holes and insert wooden dowels from a craft store to assist the birds as perches. Holes also punched at the bottom can help drain water that may accumulate during spring rain or your sprinkler cycles. Furthermore, kids can paint the outside of the jug with acrylic paint.
Sliced Bread Feeders
Ingredients
- 2-4 Slices of Bread
- Yarn or String
- Peanut Butter
- Birdseed
- Optional: Plastic Knife (For Kids), Cookie Cutters, Wax Paper
Here are the steps to make this project
- Remove the crust from 2-4 slices of bread. A child can do this by tearing which assists in fine motor development, while others can use a plastic knife unassisted. Older kids may want to “personalize” their slices by using cookie cutters to create an object or shape with the bread.
- Poke a hole in the center (with your finger or object) and pull yarn or string through to make a loop at the top.
- Next, leave it out a couple of days to harden. I choose to place on a cookie sheet in the oven or microwave while not in use.
- Take the peanut butter and spread a thin layer on one side of the bread.
- Press into a small amount of birdseed. Again, a small bag of mixed seeds can be found in many grocery or warehouse stores.
- Layer the other side and press again. (Wax paper may help prevent a larger mess on your hands for more efficient clean-up time later).
- Hang onto sturdy branches and delight in the birds finding and enjoying them!
By Sheila, Free Stuff Finder Contributor
Leave a comment